
How To Put Up A Tent
If you're new to camping, the thought of putting your tent up might be a bit stressful. And, if you've never done it before, it really can be. From knowing where each of the poles goes to securing your groundsheet and making sure everything is pegged correctly, there's a lot to think about. If you have kids to entertain as well, your stress levels might rise quite quickly.
We've all been there and made those first camping trip mistakes. That's why we've created this guide, so you can learn from our mishaps, put your tent up with ease and enjoy your camping trip in the UK. We will cover:
- Check all your equipment
- Practice putting up your tent before you go
- Deciding where to pitch your tent
- Top tips for putting up your tent
- How to put up a tent
Check all your equipment
Whether you have bought a brand new tent or a second hand one, check that you have all of the pieces to put up your tent. Your tent should come with an instruction booklet, listing everything that comes with the tent. If it is second hand, enter the tent make and model online and you should be able to find a list of what's included.
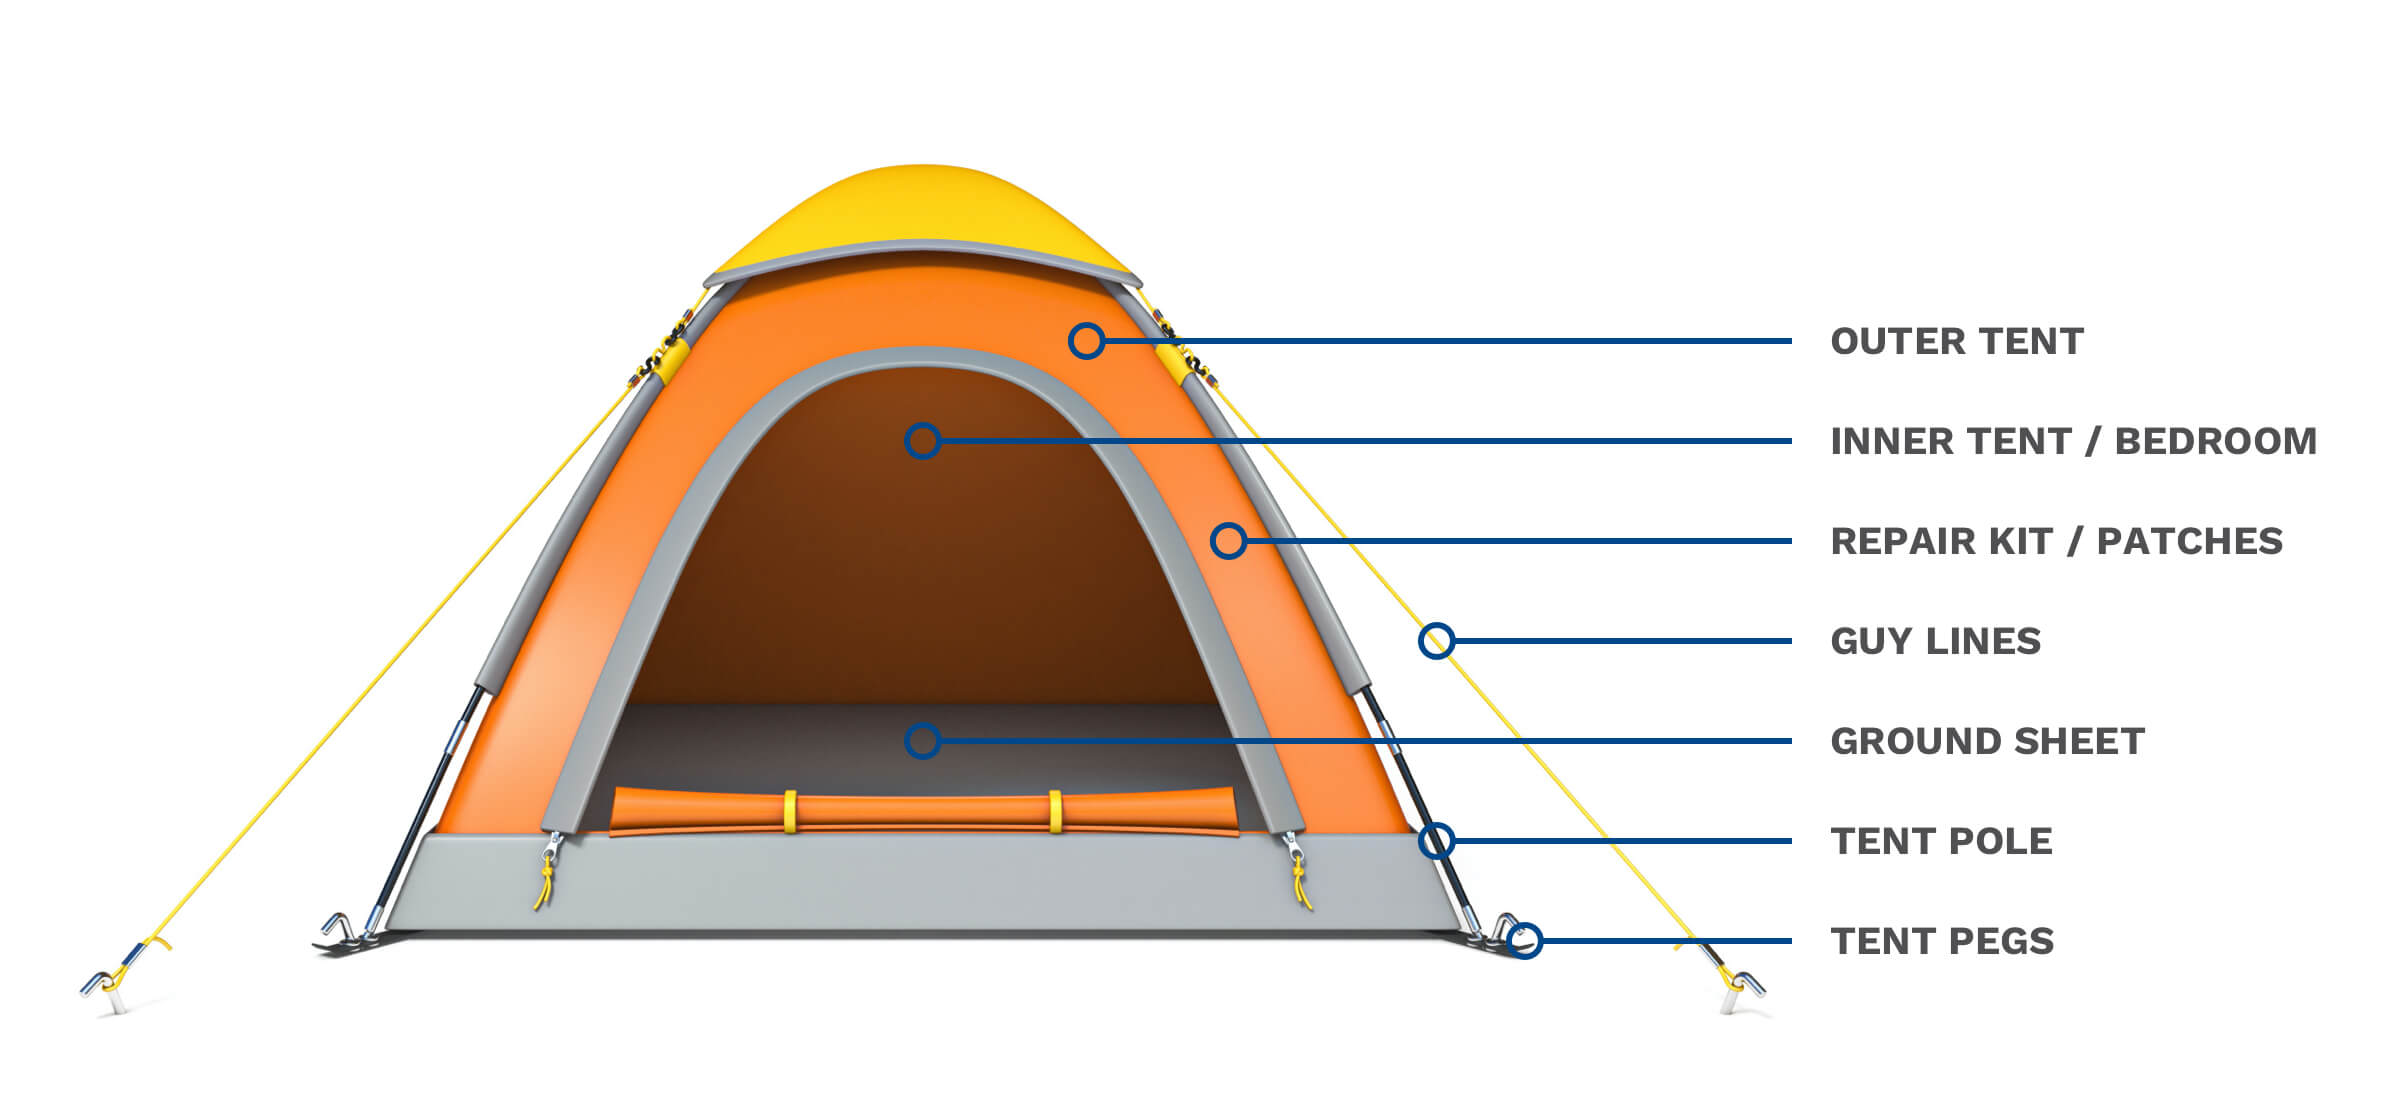
Start by opening the bag in the garden and unfold the tent on the grass. You should be looking for the following items:
- The outer tent
- Any bedrooms or inner tents
- All tent poles
- Guy lines to stabilise the tent
- Enough tent pegs for the edge of the tent and the guy ropes
- Groundsheet
- A repair kit or patches
Some of the items may be connected such as the inner tent, groundsheet and bedrooms or the guy ropes may already be tied to the side of the tent. It is also a good idea to take spare items with you in case anything gets lost or damaged such as a groundsheet, extra pegs and repair kits or patches.
Types of Tent
Tents come in various styles, each with its unique features and setup requirements. Understanding the different types can greatly impact the ease of setting up your shelter.
Dome Tents
Dome tents are characterised by their rounded shape, which offers excellent stability against wind and rain. They typically have flexible poles that cross over each other, forming a dome-like structure.
Setting up a dome tent usually involves assembling the poles and then attaching the tent fabric over them. While they can take a bit of time to set up, they tend to be sturdy and spacious once pitched.
Pop-Up Tents
Pop-up tents are designed for ultra-quick setup. They typically have a spring-loaded frame that instantly pops into shape when released from its storage bag. This makes them ideal for camping novices or those who value convenience and speed. However, pop-up tents may sacrifice some durability and weather resistance compared to other types.
Tunnel Tents
Tunnel tents have a long, tunnel-like shape with flexible poles forming the structure. They offer ample interior space and are relatively easy to pitch, often requiring you to feed the poles through sleeves or attach them to clips.
Each type of tent has its pros and cons when it comes to setup time, stability, and suitability for different camping environments.
Practice putting up your tent before you go
It doesn't matter if you're a complete newbie, a seasoned camper or if you're pitching a 1 man tent or big family tents, we can't stress enough the importance of practising putting your tent up before your camping trip. You don't have to set up your kitchen area or blow up your air beds, but familiarise yourself with where everything goes in the main body of the tent.
All of your poles will likely be colour coded so you know which pole goes where. Equally, the groundsheet and inner sections of the tent will be the same shape as the footprint at the base of the tent so it is easy to tell what way around things go without blocking the doors.
Practice putting up and taking your tent down a few times at home so you can take your time to learn where everything goes and put it up confidently when you reach the campsite. Not only will this help to avoid any arguments when you're setting up, but if you know exactly what you're doing, you are less likely to damage the tent.
Deciding where to pitch your tent
If you have a choice of where to pitch your tent, the space you choose could really affect your comfort levels and how much or little you enjoy your holiday. Here are some of the main things you should consider.
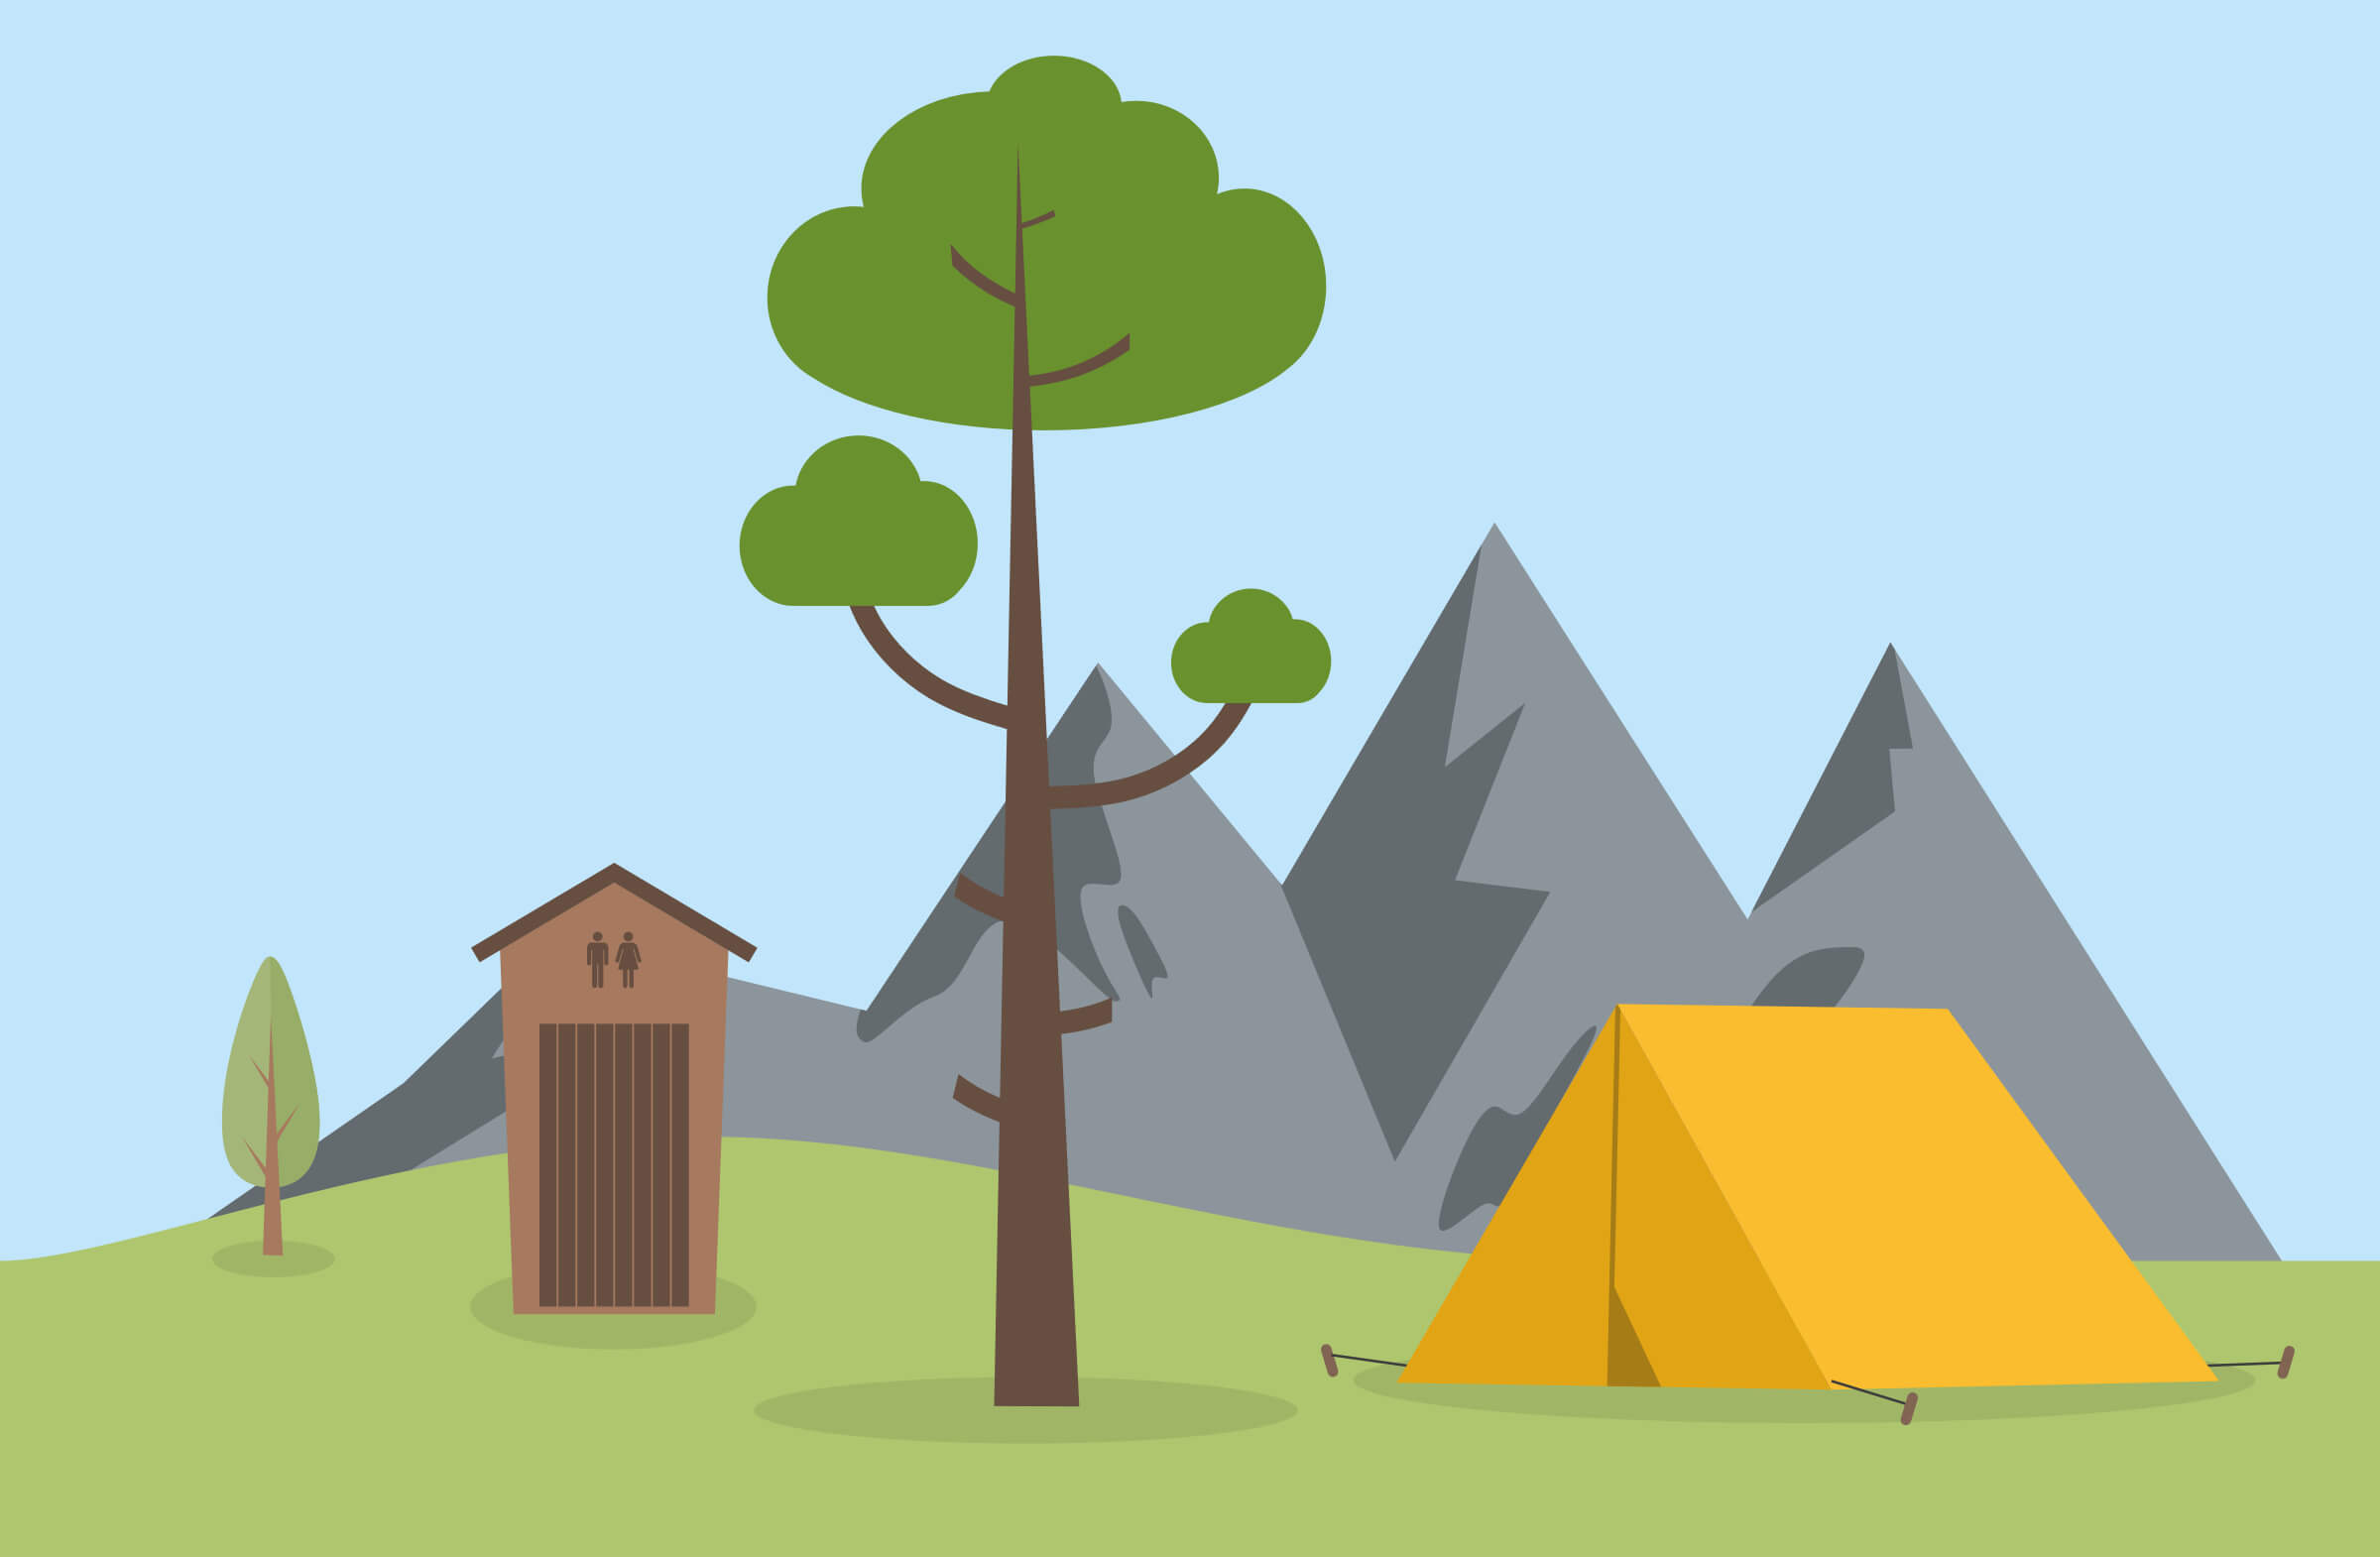
How close do you want to be to the toilet block?
If you are enjoying a family camping holiday with young children, pitching your tent close to the toilet blocks could be essential if you need to get there in a hurry. However, if you have your own portable toilet or want a more peaceful pitch, this could be an area to avoid as it can get busy, noisy and sometimes even a bit smelly.
Is the ground appropriate for sleeping?
Check the ground for sharp rocks, sticks, and other debris that could damage your tent floor or make sleeping uncomfortable. Clear the area before setting up your tent. Avoid rocky or gravelly areas.
Top tips for putting up your tent
Choose the right location
- Make sure the land is flat: Find a flat piece of land to pitch your tent. That way, if it rains, your tent is less likely to get flooded. Equally, you probably want to avoid sleeping on a slope for a better night's rest.
- Think about the weather (Sun): In the height of summer, you may want to pick a shaded area. If you don't want to be in the shade, keep in mind that your tent can get extremely hot inside and could become damaged from too much sun exposure.
- Think about the weather (Wind): Position your tent so the door is facing away from the wind in case of strong gusts. This can help to prevent the door from flapping in the wind as well as avoiding the tent from getting too cold.
Comfort and Protection
- Bring duct tape for repairs: Bring duct tape for quick fixes, such as repairing torn fabric, broken poles, or sealing leaks.
- Place a groundsheet inside the tent: Place a groundsheet inside the tent for extra insulation and to keep the tent floor clean and dry.
- Thermal blankets: Place a thermal blanket between the tent and the rainfly to reflect heat and keep your tent warmer.
Practical Hacks
- Portable light sources: Bring headlamps, lanterns, or string lights to illuminate your campsite. Solar-powered options can save battery life.
- Multi-purpose gear: Items like a bandana can serve multiple purposes—sweatband, washcloth, potholder, etc.
- Reusable bags: Use reusable zip-lock bags for organising gear, keeping clothes dry, and storing food.
How to put up a tent
By the time you get to your campsite, you should have had plenty of practice putting your tent up so it should be easy to pitch. Tunnel tents are a bit more straightforward as all of the poles go in the same direction whereas those with crossing poles can be a bit more tricky so ensure you know exactly where each of the poles goes.
- Take the tent out of the bag and roll the outer tent or flysheet out onto the grass. Choose a position where the doorway will be facing away from the wind if you face any harsh gusts.
- Assemble all of the poles and lay them on the ground next to the corresponding pole sleeve on the tent. They should all be colour coded so you know which pole goes where.
- Start feeding each pole through the sleeves on the flysheet then start bending the poles to form the shape of the tent and secure the pole in place at each end with the pin. On a windy day try to have someone help you to hold the tent so it does not blow away or peg it down in one or two places while you are putting the poles in.
- Peg the middle pole in place on either side first then work your way out to peg the other poles and guy ropes in place using a mallet. You want to make sure the fabric is tight and doesn't sag so that any rainwater can run straight off your tent.
- Once the tent is sturdy, go inside and attach the groundsheet. It should secure near the bottom of each pole with toggles or by pegging it into place
- Next, set up your bedrooms if these are separate from the outer tent. Again, this should fit the shape of your tent and secure in a similar way to the groundsheet. You will also need to lift the bedroom up and attach it to the inner part of the outer tent too, most likely by the poles.
- Once you are satisfied that your tent is secure, adjust the tension bands inside for extra stability and go around the outside to ensure the guy ropes are tight and everything is pegged incorrectly. You may even want to set up some windbreakers to protect your tent from harsh gales and give yourself some privacy.
Once you can confidently put up your tent, you're ready to go on exciting camping adventures for years to come. The better you take care of your camping equipment, the longer it will last so it really is worth taking your time setting up and giving your tent enough time to dry out before packing it away.
To make your camping holiday as comfortable as possible, you'll likely want to take as many luxuries with you as possible and that means more space. With a Witter Towbar, you can create extra space for a trailer or platform carrier or maximise space with a roof box. The important thing to remember is to relax, have fun and always clear up after yourself whether you are wild camping or staying on a campsite.